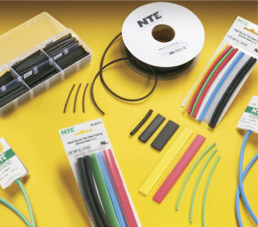
Heat Shrink Tubing
NTE has a best selling line of heat shrink tubing.
Sizes and types include:
- Thin Wall, available in 6 and 48 inch lengths, as well as 25, 50, and 100 foot spools with a 2:1 shrink ratio
- Dual Wall w/adhesive, available in 6 inch and 48 inch lengths all with a 3:1 shrink ratio
- Medium Wall, available in 48 inch lengths
- Thick Wall, available in 48 inch lengths
- Assorted size and color pre-packaged kits
- 11 different colors available in the Thin Wall series
- Resistant to common fluids and solvents
- All UL and CSA listed
How to select and use heat shrink tubing:
Select the proper size of heat shrink tubing for your project. In order to get a secure fit, be sure that the tubing’s recovered diameter (the diameter after shrinking) is smaller than the diameter of the area you’re going to insulate. At the same time, the tubing’s expanded (the diameter before shrinking) needs to be large enough to easily fit over the area to be insulated, as well as any connectors attached to it.
Cut the heat shrink tubing to a usable length, and be sure to allow for a minimum 1/4” overlap over any existing insulation or connectors. Keep in mind that tubing also shrinks lengthwise - typically 5-7% during the shrinking process.
If covering an object, slide the cut tubing over the object that you’re covering; if splicing, slide the tubing over the splice, centering it to allow for equal overlap on both sides.
Before shrinking, check your tubing's specifications for the recommended heating temperature. Any commercial heat gun or heat shrink oven can be used to shrink the tubing. NTE has some great options available at: http://www.ntepartsdirect.com/ENG/CATEGORY/HEAT_GUNS. Since uncontrolled heat can cause uneven shrinkage, physical damage and insulation failure, the use of an open flame is really an emergency resort.
Helpful Hints
- If you’re covering a long length of cable with tubing, begin shrinking at one end, and gradually work your way down to the other. To ensure that the tubing shrinks evenly and without air bubbles, rotate the project as you’re applying heat.
- Evenly apply heat over the length, and around the diameter of the tubing, until fit is uniformly shrunken and conforms to the shape of the cable, hose, or splice that it’s covering.
- Avoid overheating the tubing as it will become brittle and/or charred.